 Sometimes your controllers will become unresponsive, or you just want to reset your controllers to something you think will be more appropriate for the system or type of game you are playing, it means that it’s time for you reset your controllers on RetroPie.
There are actually two ways of doing this, depending on what’s your situation. When your controller setup is not working properly, there will be cases when the controller allows you to navigate fine and enter games, but once you’ve entered a game, the controller does not work anymore, and you can’t even exit the game by pressing SELECT+START. In other instances nothing is working and you are thinking that the best way is to shut down the RetroPie and start over.
Before you make any decisions you might regret later, let’s see what to do in both scenarios mentioned above:
My Controller Works on the Retropie Menus, But I Can’t Play Any Games
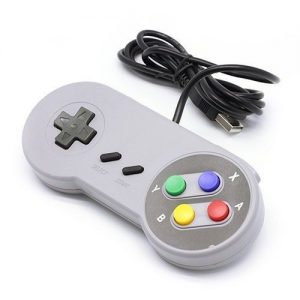
This has been a very common occurrence we’ve seen a number of customers having. In my experience, it seems that it happens randomly, however we’ve shipped Retropie images from 2017 to 2020 that comes setup with a generic Dualshock style controler, and when people setup their controllers, for some reason, menus work but games don’t.
Since December 2019 we’ve decided to ship images where controllers are not setup out of the box at all, and you are prompted to setup your own controller upon booting for the first time into the image. That reduced quite a bit the number of people having controller issues, however, the issue might happen when the customer just did not setup the controller properly, and when he/she tries again, it happens!
When you can move in menus with the controller, but it does not work in-game, here’s what to do:
Go to the Retropie / Options menu and select the RETROPIE SETUP option.
You’ll enter the famous “blue menu” of the Retropie. Select MANAGE PACKAGES.
On the next set of options, go for “MANAGE CORE PACKAGES”.
Then on the next menu, select “Emulationstation (Installed)”
Within EmulationStation’s options, go to “Configuration / Options”
Now, you can reset the controller. Select the first option on this screen:
“Clear/Reset Emulation Station input configuration”
Confirm with “Ok” on the next couple of screens to reset the controller configuration for Emulation
The screen will blink for a second and you’ll be back on this menu.
Hit “Cancel” to go back a few times until you see the main menu and the option to “Reboot”. Do it so you can reboot back into EmulationStation and be asked to setup the controller for the fist time.
Setup your controller as you please and now everything should be working fine!
Controller Does Not Even Run on Menus!
For this one, you’ll need a keyboard. Plug a keyboard to an empty USB port on your Raspberry Pi.
Now, provided you are anywhere on the Retropie menu, hit F4 to exit to the system, you’ll exit EmulationStation and you’ll see a black screen with a command prompt that looks a lot like DOS, but it’s not.
Now type:
rm /home/pi/.emulationstation/rs_input.cfg
Then follow it by:
emulationstation
Follow the prompts for the menu as on the step above, but using the keyboard!
This process will give you a fresh setup for controllers and your games will likely work again after doing the controller reset.
Wait! I did all that, but my controllers still do not work properly!
The issue might be something other than a bad setup in RetroPie. Maybe your controller is not fully compatible with RetroPie/EmulationStation, and although that is a rare occurrence, I’ve seen some 8BitDo controllers with older firmware being nearly 100% incompatible, as well as some PlayStation controllers. These issues have been solved for the most part with the most recent controllers in the market and the latest RetroPie installations recognizing a broader selection of controllers.
Now, you might be using the correct type of compatible controller, and still nothing works as intended. In that case the issue might be your power supply. Being a small board, the Raspberry Pi, regardless of the model, needs very little power to work, and most power supplies will reflect that by providing at least the required 20W, 5V and 2.5A of power to keep your Pi working, but they are not enough to power accessories plugged into the USB ports such as keyboard, mouse and controllers at the same time, and when that happens, controllers will disconnect all the time.
Try to get an Official Raspberry Pi power supply, because those will always work properly providing enough power for all USB ports. There are also some specialized power supplies in the market, such as the ones from Argon.
Most people take the power supply for granted, specially when buying those ready to use kits from Amazon, but the power supply is a very important part of your setup, and the proper power brick might solve a lot of the issues you might be having.